How to Track Click Funnels Orders
Although ClickFunnels has an inbuilt CAPI Solution, it’s not very flexible. Let’s say you want to track a specific button or even get total purchase values, and see whether or not a specific product is sold and send that data to Facebook? Unfortunately, there is no control over what ClickFunnels automatically sends to Facebook, but, using Deviate Tracking, we can send any data we want.
You can use Deviate Tracking side by side with the native integration by using the Advanced features inbuilt with Deviate Tracking. Firstly, let’s install GTM to our ClickFunnels campaign if it’s not already installed:


Now that we have GTM installed, we are ready to use Deviate Tracking. If you haven’t already setup your Deviate Tracking Page View tag, please follow our Quick Start Guide on how to import our GTM tag from the gallery and setup basic variables for Deviate Tracking.
TRACKING PRICING DATA
ClickFunnels uses a variety of in built templates, this tutorial will cover the code for standard templates, and may not working with custom pages, depending on how it was coded. In our testing, our premade script covers about 90% of ClickFunnels pages.
Firstly, in GTM, add a new Custom HTML tag, that will trigger on the URL Page View of your order complete page.
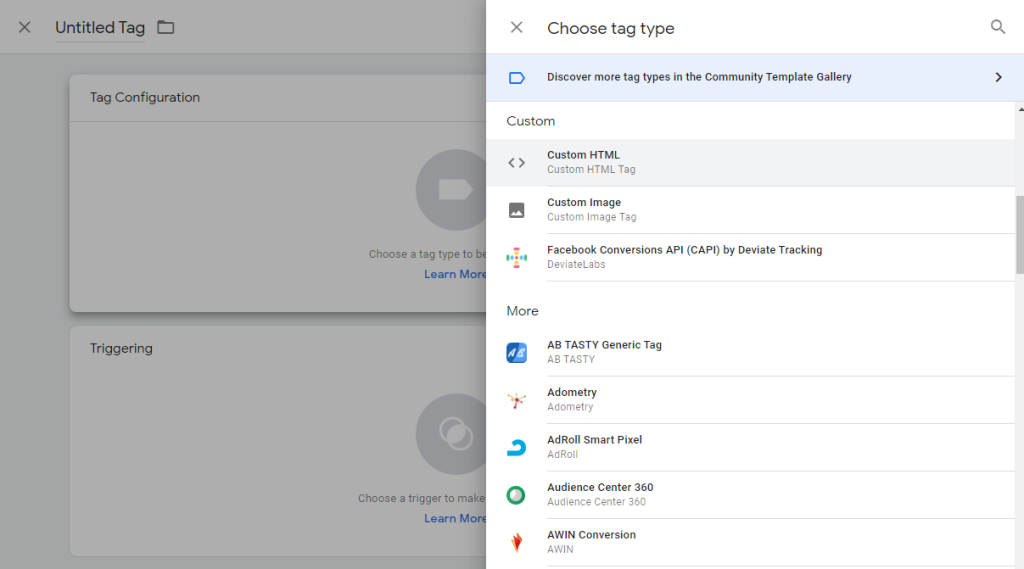
Then add the following code into the Custom HTML Tag:
var myOrderTotal = 0;
var myOrderItems = document.getElementsByClassName("elOrderProductOptinProducts");
var myNumItems = myOrderItems.length;

for(var i = 0;i<myNumItems;i++){
var myAmountString = document.getElementsByClassName("elOrderProductOptinPrice")[i].innerText.match(/\d/g);
var myAmount = parseFloat(myAmountString);
myOrderTotal = myOrderTotal + myAmount;
}
myOrderTotal = Math.round(myOrderTotal * 100) / 100;
dataLayer.push({'TotalCFPrice': myOrderTotal});
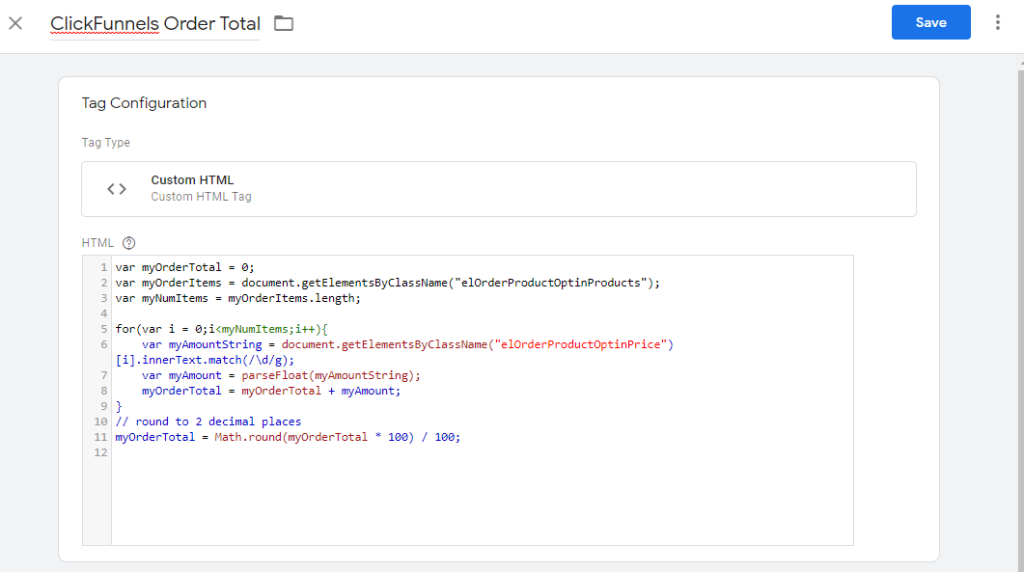
We want to make sure this script is triggering on your Order Confirmation step of your ClickFunnel:

This will push the pricing data into a Datalayer Event, which can be then read by GTM as a variable.
Next add a GTM Variable, by going into the side bar, and adding variable:

For the Variable Type we are going to choose DataLayer Variable and enter the value , ‘ TotalCFPrice’
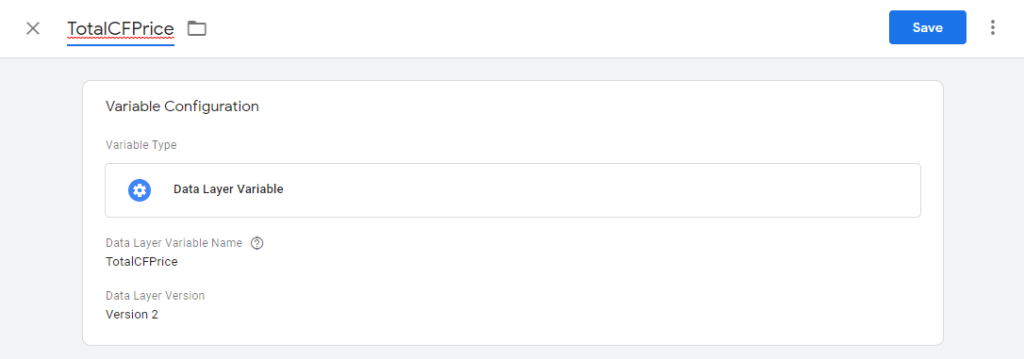
And that’s it! Any tag that triggers on your order complete page should now have this variable data.
Tracking Upsells / Downsells
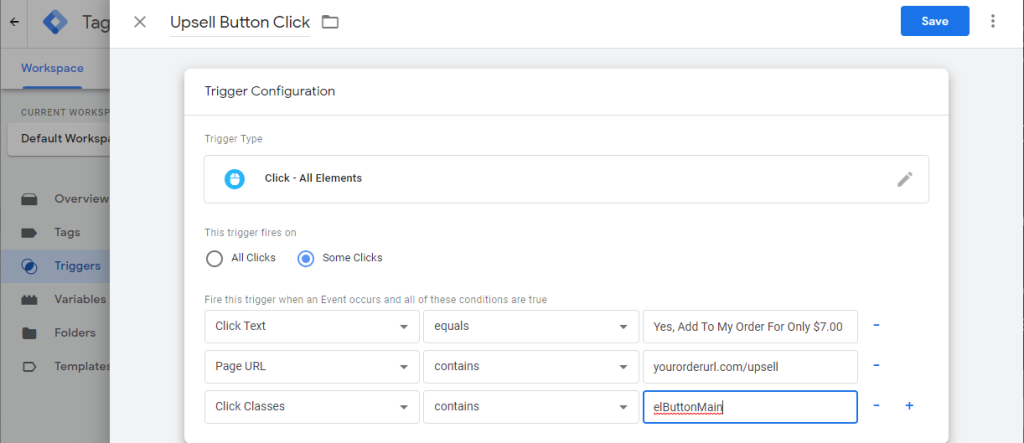
This can be done using Click Tracking triggers, and to ensure that there wasn’t a double count, we’re going to use the advanced settings in Tag Manager. Firstly, add an inbuilt variable for Click Text tracking and Click Classes tracking.
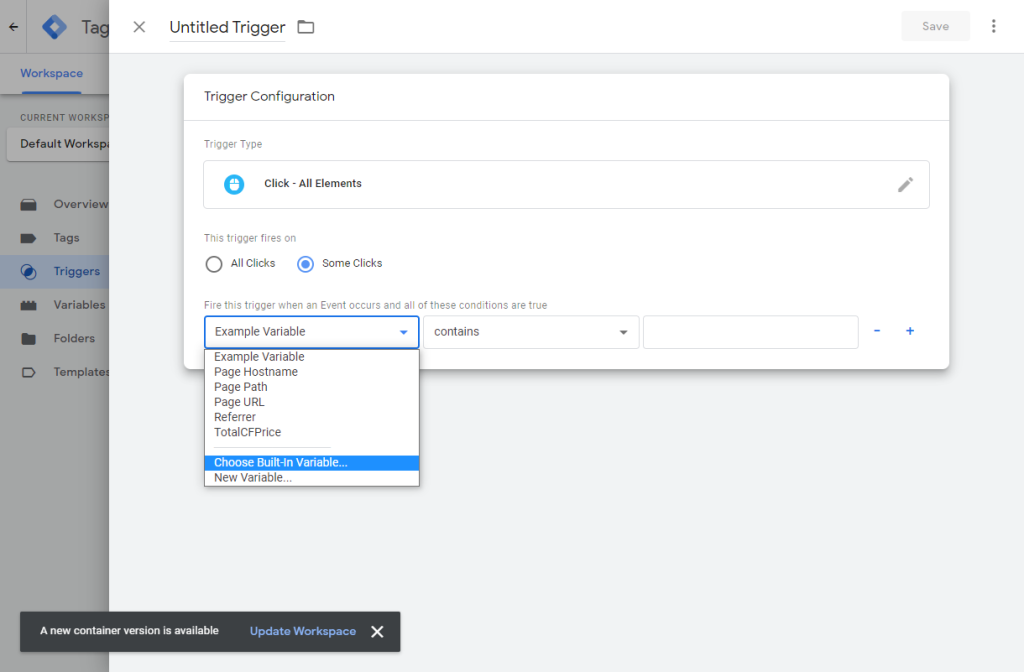

You also want to add Click Classes while you are here. Afterwards setup your settings like below, where Click Text is the text in your button and Click Classes is set to ‘elButtonMain’. For the URL, ensure that it matches the particular URL that your upsell/downsell is on.
But the above only tracks whether or not a button was clicked. What if a user clicked a button but didn’t actually finish ordering? We can account for this using a cookie that will track if a button was pressed and save it throughout the checkout process.
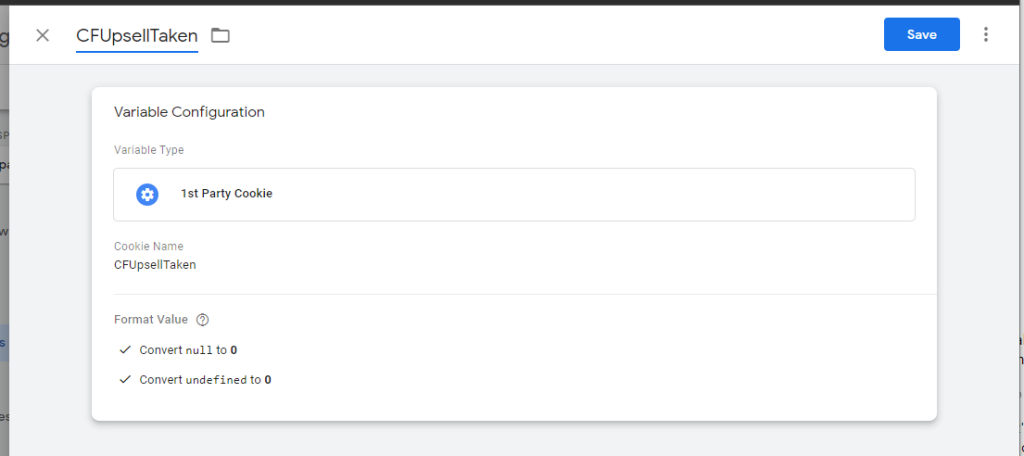
First let’s add a variable that can read a 1st party cookie with the name CFUpsellTaken.
Then let’s setup a tag, that fires only when the Upsell button is clicked:
<script>
var cc = {{CFUpsellTaken}}-0+1
document.cookie="CFUpsellTaken="+cc+";path=/;";
</script>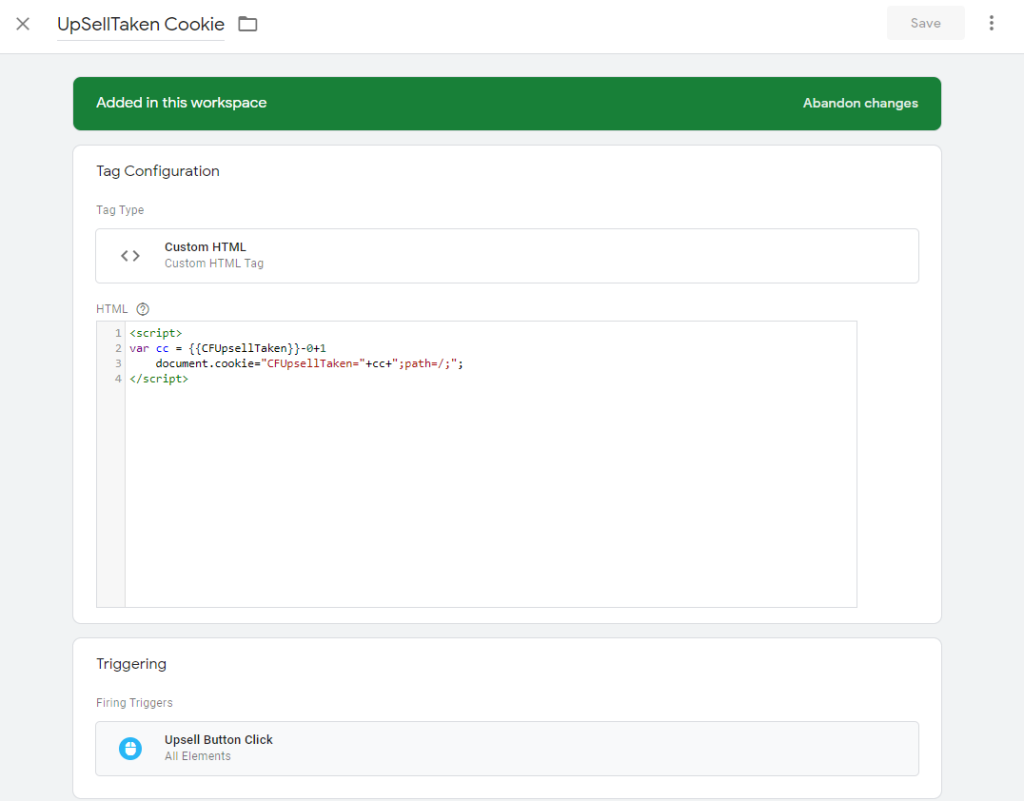
After that we can set up another tag that only firest when the Upsell button was clicked AND the order was completed.
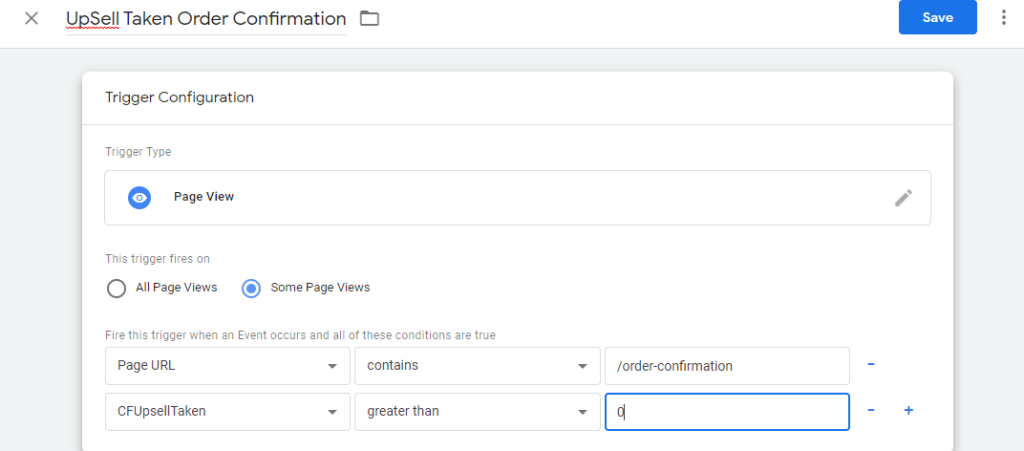
After the trigger is set up, we can use it with our Deviate Tracking tag!
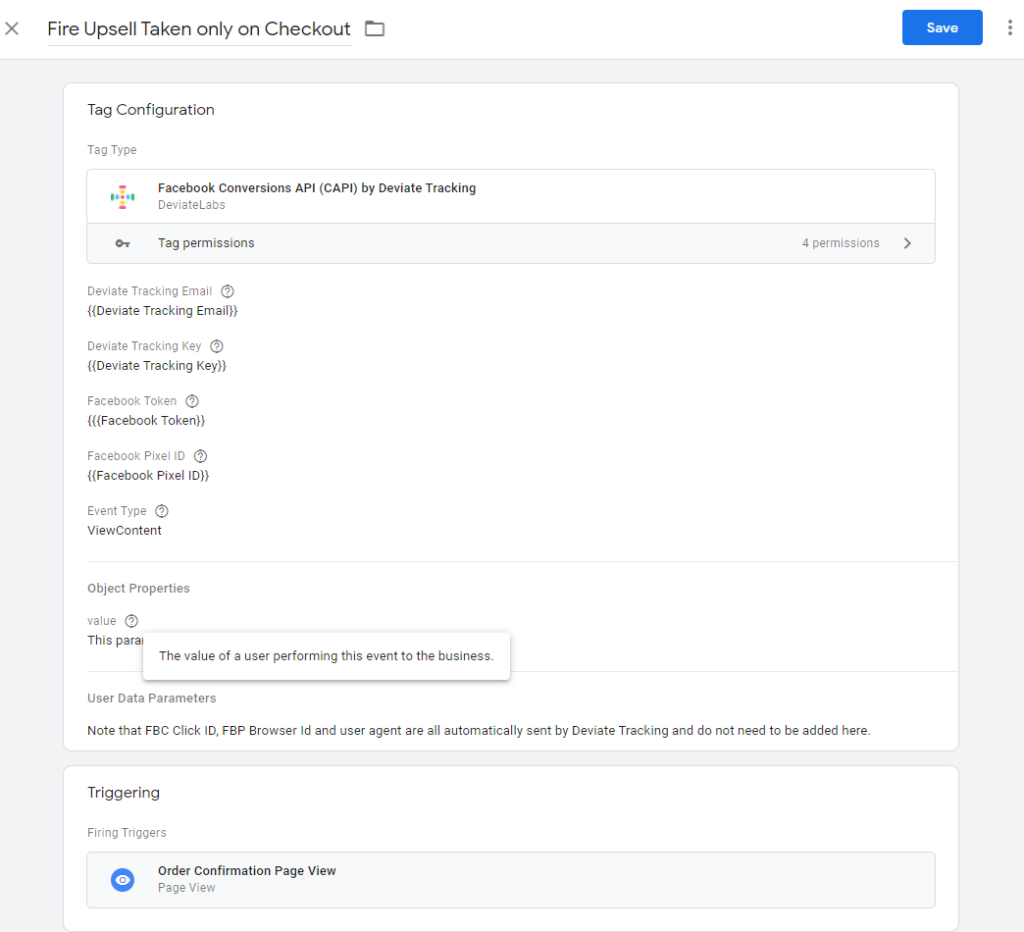
And that’s it! This will trigger only when a user clicks on your specific button! The tutorial should cover all the included templates, but may not work entirely if there are a lot of custom modifications to your funnel. Remember to test your GTM setup using GTM’s Preview mode.