Installing Deviate Tracking
Before adding any tags using Deviate Tracking, you need the following four items. Save them as GTM variables to avoid having to copy and paste them each time you create a tag.
Pixel ID
The pixel ID indicates which pixel Deviate Tracking should send data to. You can get it from inside Facebook Events Manager at the top right of the Overview tab.

Facebook Access Token
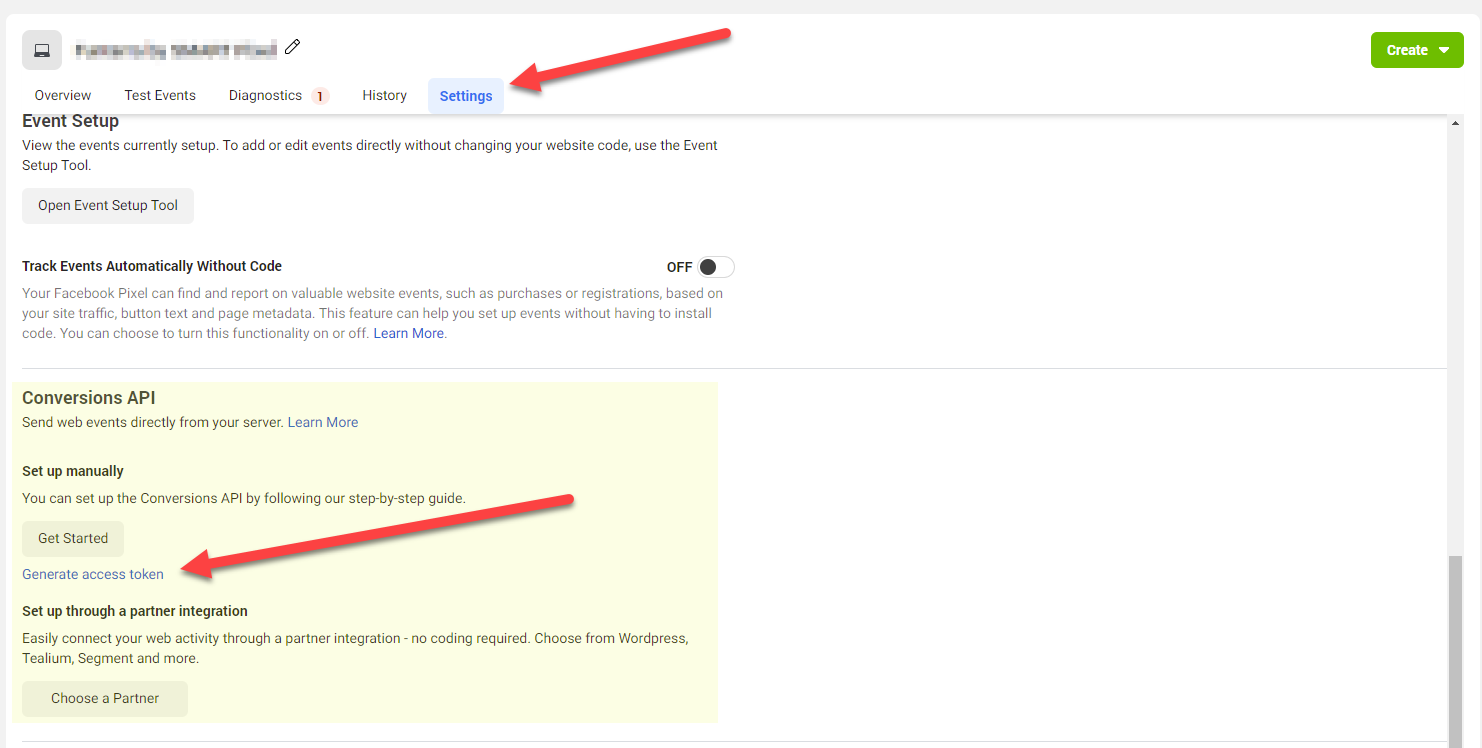
Deviate Tracking uses the access token to prove that it has permission to send data to your pixel. You can get it from insideFacebook Events Manager. Go to the Settings tab, then scroll down to the Conversions API section. Click the link titled Generate access token and then copy the text it produces.
License Key and Email
Your license credentials are in your subscription’s confirmation email. If you can’t find it, try searching for emails from [email protected] or checking your spam.

Creating Variables
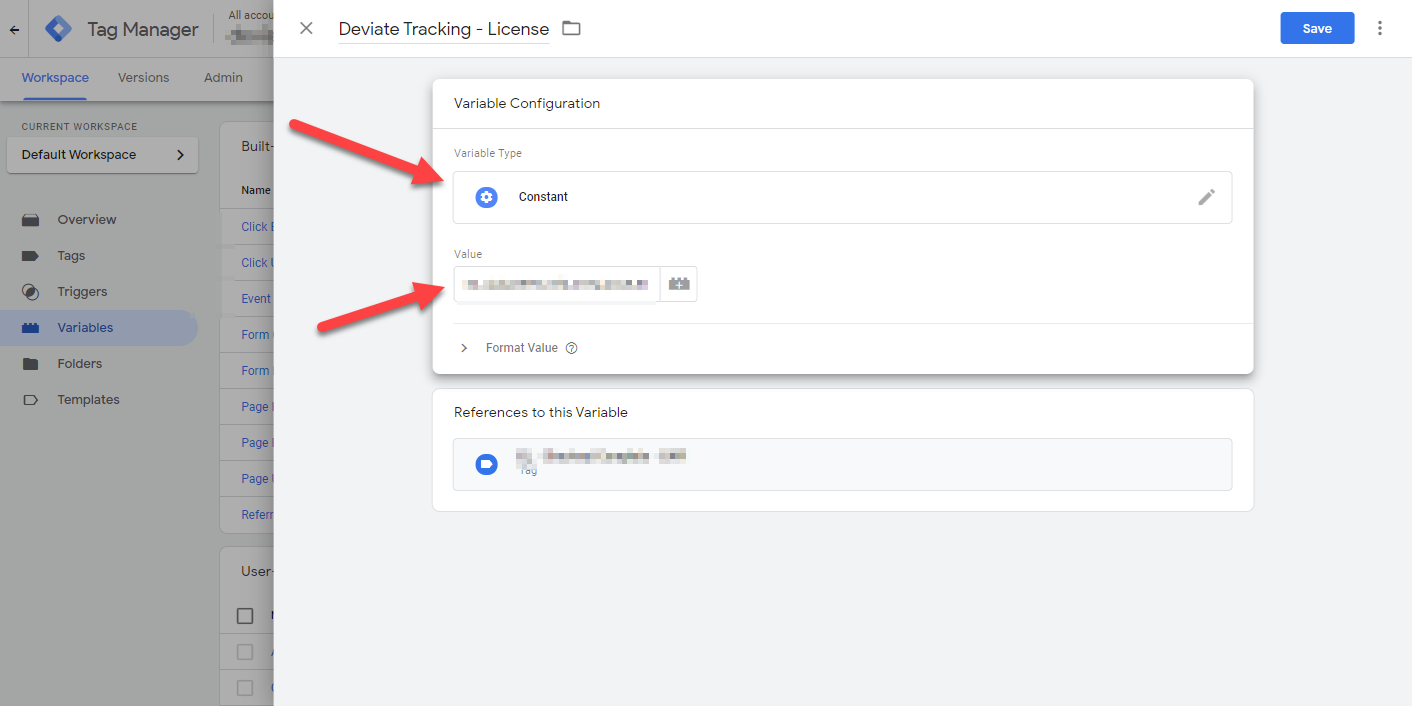
You should save these four items as variables in Tag Manager. Click on the Variables tab on the left, then choose the Constant variable type. This might seem like a hassle, but it will save time in the long run.
Update CAPI User Access
Before moving forward, you need to grant “Conversions API System User” the proper access to your pixel. Visit Events Manager and go to Users -> System Users.
You should see a new user called Conversions API System User. This user is automatically generated along with your access token. Click the CAPI user to open up the Assigned Assets screen. Make sure that Manage Pixel is highlighted, then click Save.

Import Deviate Tracking
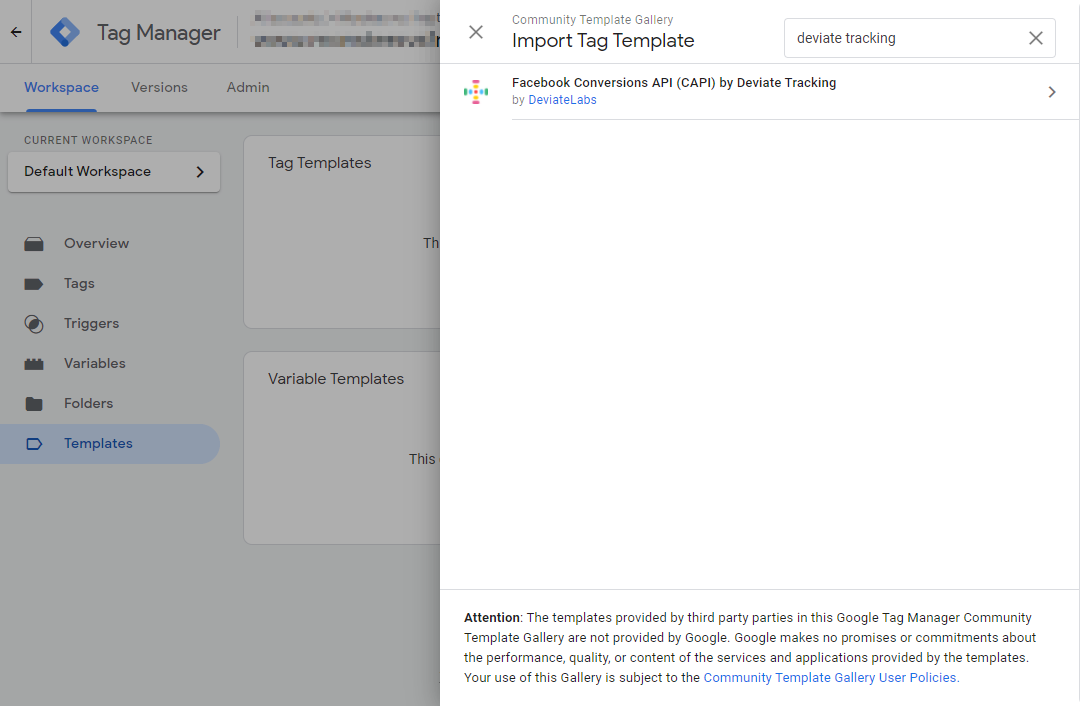
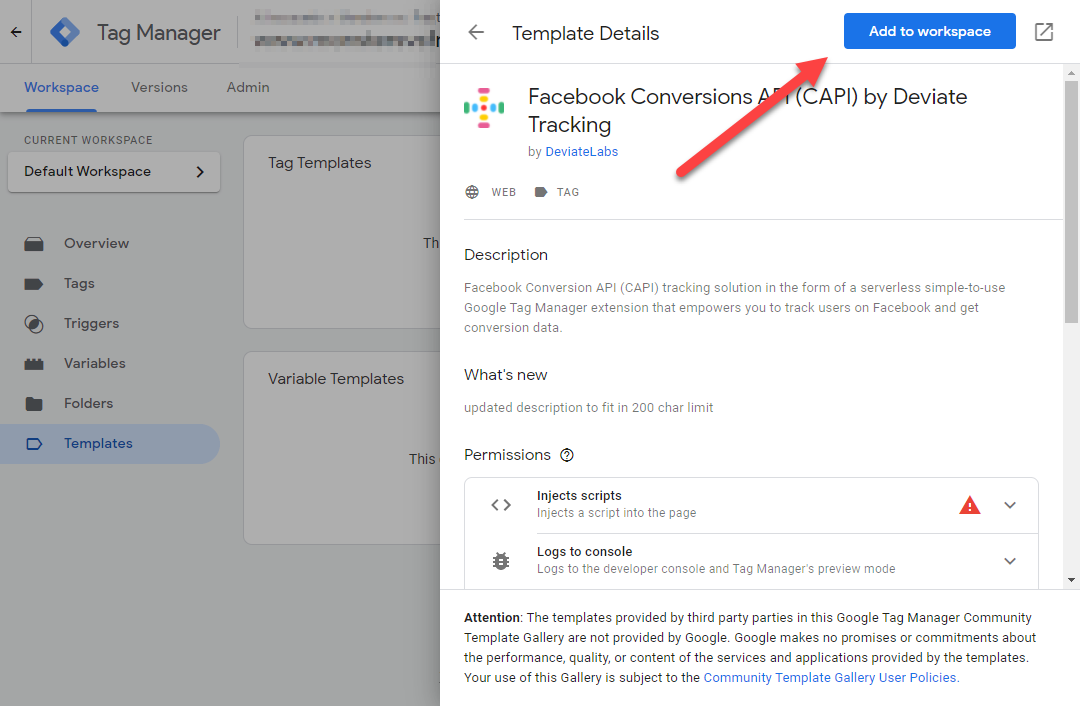
Head on over into your Google Tag Manager and enter the appropriate container. On the left, click Templates, then Search Gallery and search for Deviate Tracking. Click the top result and add it to the workspace.
Create Your Tag
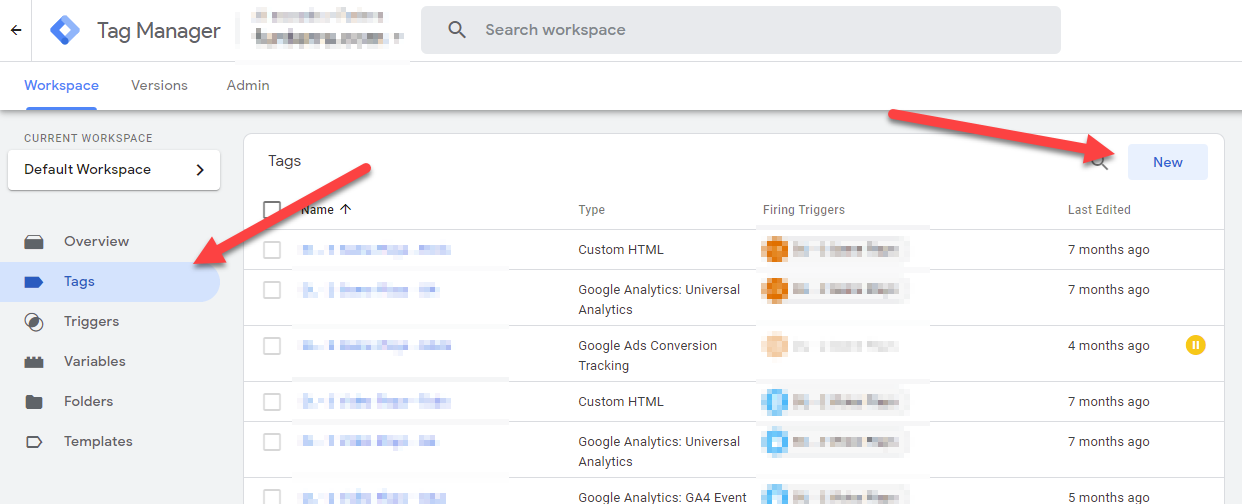
You are now ready to start wiring up your website with analytics. Create a new GTM tag by clicking on Tags, then on New. For Tag Type, scroll down to find Deviate Tracking.
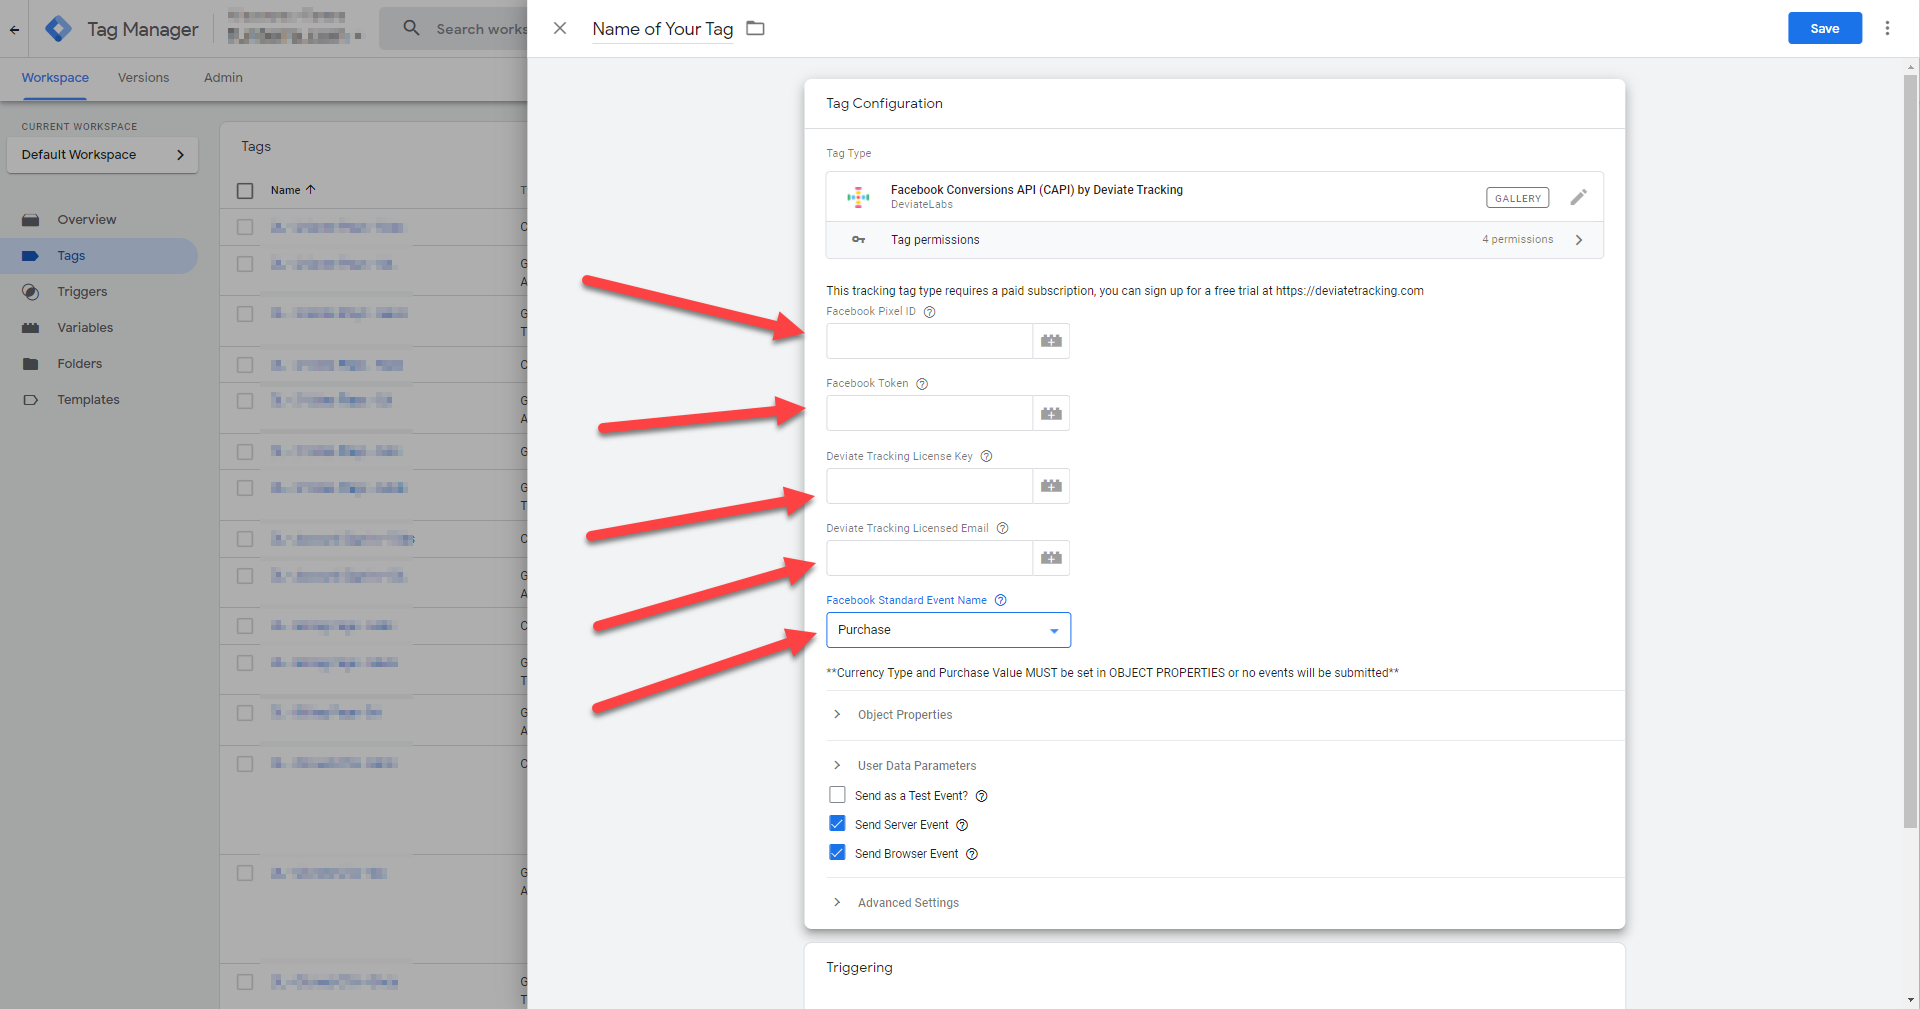
In the tag creation dialogue, provide a tag name and set up your triggers. You will also need to enter the four items from the beginning of this guide:
- Your Facebook Pixel ID
- Your Facebook access token
- Your Deviate Tracking license key
- Your Deviate Tracking license email
Make sure to specify a Standard Event type (check out our Match Quality guide to learn why this matters). Note that Deviate Tracking automatically sends both a browser and a server (CAPI) event. You should leave both boxes checked to maximize the chance of Facebook receiving your data.
Set up Deviate Tracking pixel
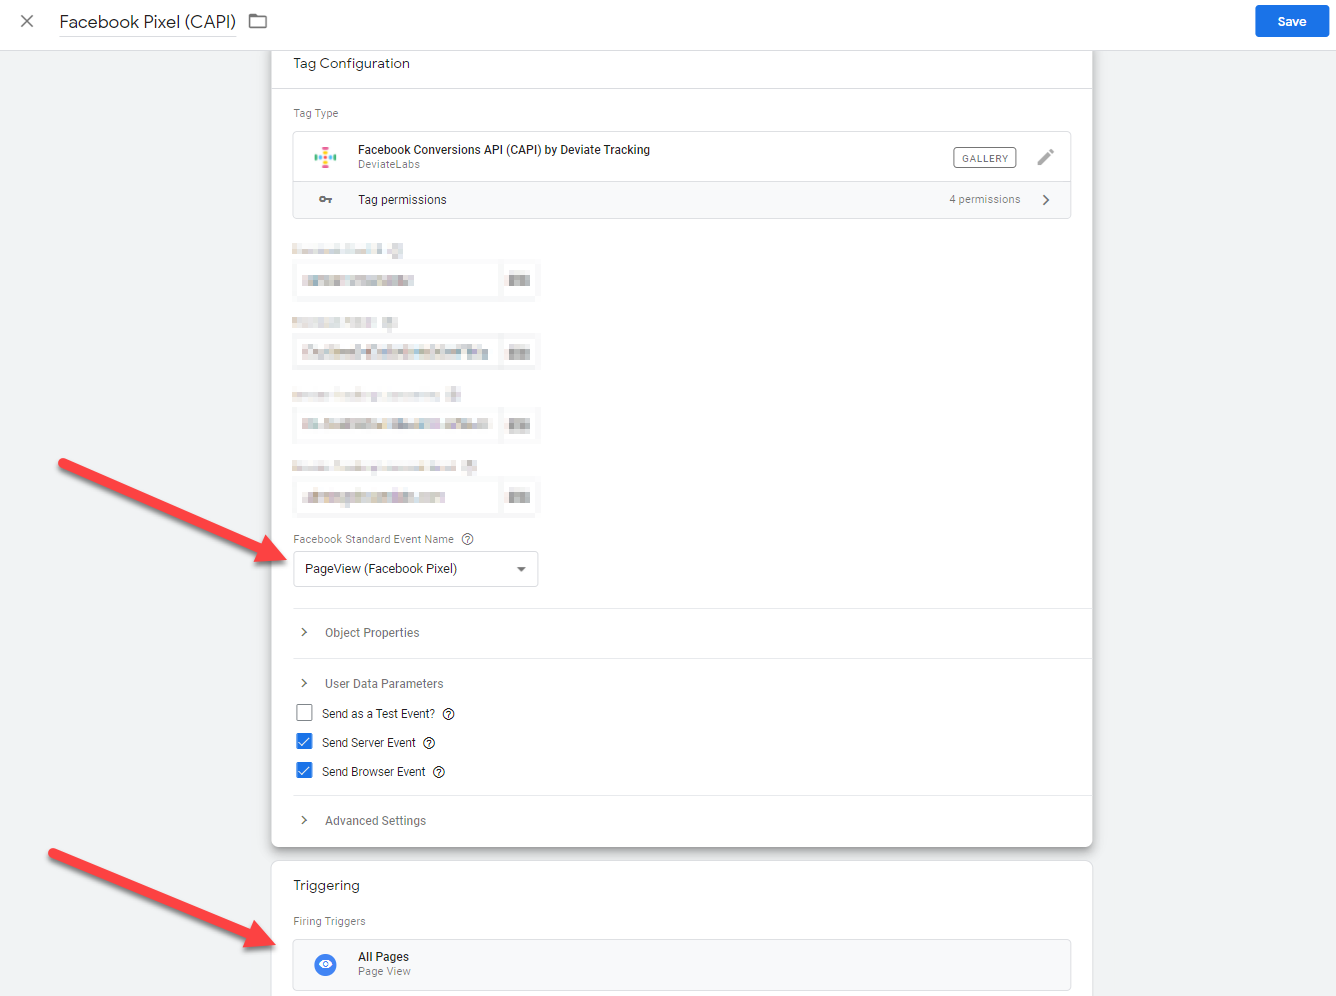
You’ll want Deviate Tracking to handle your Facebook pixel so your browser and server events are synchronized. This means you need to create an extra tag. Name is “Facebook Pixel (CAPI)” and select the PageView (Facebook Pixel) Standard Event type. Set the trigger to All Pages and save the tag.
You can now delete your legacy Facebook pixel code. It may have be in a Custom HTML tag, or injected into your head element through a plugin or site configuration setting.
Note: If you do not delete your legacy pixel code, Deviate Tracking will not function correctly. We are aware of this shortcoming and a fix is on our roadmap.
The last step is to test that your Facebook pixel is set up correctly. Install the Facebook Pixel Helper extension and navigate to your website. Click the Facebook Pixel Helper icon in your browser’s top bar and you should see that it shows a PageView event.
Congratulations! You are now ready to create any other tracking tags. Don’t forget to publish your GTM container when you’re finished.